Categories
3D Design

3D Fashion Experiment: Woman ‘s dress

3D Fashion Experiment: Woman ‘s dress

Screen Shot 2017-07-25 at 18.45.42

Figure 1: Marvelous Designer 6: Using shapes and stitching them together to fit over the body

Screen Shot 2017-07-25 at 18.46.43

Figure 2: Marvelous Designer 6: Using the physics stimulation to make the shape behave as cloth.

Screen Shot 2017-07-25 at 21.06.10

Figure 3: Marvelous Designer 6: Using contraints to shape the cloth as a dress. 

Screen Shot 2017-07-25 at 21.06.20
Categories
3D Design

Improved Shirt Model

Improved Shirt Model

Screen Shot 2017-07-11 at 16.36.58
Screen Shot 2017-07-11 at 15.40.14
Screen Shot 2017-07-11 at 15.39.54
Categories
3D Design

Introduction to Fashion Clothing

Introduction to Fashion Clothing


The next step to design in the brief is to design some dresses for both Men and Female. My first task is to design a Mens Shirt.

Below is the end result of the model.

Screen Shot 2017-07-11 at 17.36.48
Screen Shot 2017-07-11 at 17.36.06
Screen Shot 2017-07-11 at 17.35.58
Screen Shot 2017-07-11 at 17.35.50
Categories
3D Design

Nnamdi.Co: 3D Modeller Projects Closed Shoe

3D Project: Closed Shoe

Screen Shot 2017-03-13 at 18.32.03


Screen Shot 2017-03-13 at 18.24.36


Screen Shot 2017-03-13 at 18.24.19


ClsoedShoe_08


baked-blinn1SG-polySurface2baked-blinn2SG-polySurface1

ClsoedShoe_07 copy


Categories
3D Design

Nnamdi.Co: 3D Modeller Projects: Concept / Brief

3D Project: Concept / Brief

Recently I have spoken to colleague and he kindly introduced a friend that is developing a website which will canter an online shopping service for men and women.

What is expected from me is to design some 3D fashion items which will be implemented onto the website.


The first task that I will be doing is lady shoes. Below are some concept sketches.

img067
img070 copy
Categories
3D Design

Sketchfab Challenge: The Robots are Coming!: Finished Product

Sketchfab Challenge: The Robots are Coming! : Finished Product

The challenge is now over and below is the end product.

Robot_3D_ConceptDrawing

Figure 1: Finished Concept


Screen Shot 2017-02-24 at 17.32.03

Figure 2: Female Robot Model in Magic Voxel

https://skfb.ly/66qIO

Figure 3: Female Robot Finished Model

Categories
3D Design

Sketchfab Challenge: The Robots are Coming!

Sketchfab Challenge: The Robots are Coming!

We all know the robots are coming — to take our jobs, drive our cars or make our coffee. But what else could they do, and what will they look like?”

The objective is to design a robot using voxels.

This challenge will be interesting as it is rather unfamiliar!
Below is my concepts drawings and first impression of using a specialised voxel software called MagicVoxel.

Robot_3D_ConceptDrawing

Figure 1: Concept Drawing of Robot

Robot_3D_ConceptDrawing

Figure 2: Concept Drawing of Robot Coloured

MyRobotRender

Figure 3: Magic Voxel: Designed Robot Model First Impression

Categories
3D Design

Blender: Experiment with Fluids

Blender: Experiment with Fluids

Blender is 3D Software that is used to produce animations, visual effects and 3D models for interactive applications and games.

The difference between Blender, Maya and 3ds Max is that the software is free which is ideal for students or any hobbylists such as myself.
In order to familiarise myself with the interface in blender, I decided to create a simple experiment with fluids.

Screen Shot 2017-01-25 at 17.35.05

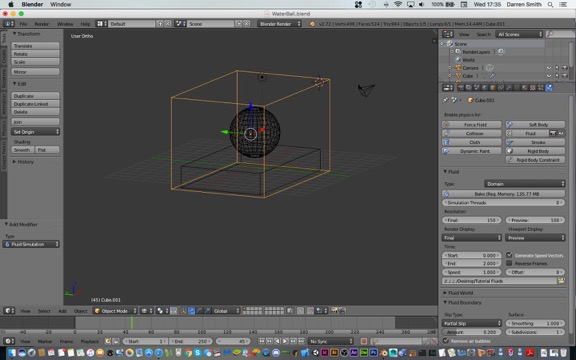
Figure 1: Object and Container set up for the fluid

The first thing I did was to create a 3D object and a container that can hold the fluids. This was done using the tools in blender to design the model, while the fluids were set up using the fluids emitter in the scene using the physics tab in the scene properties window.


Screen Shot 2017-01-25 at 18.03.48

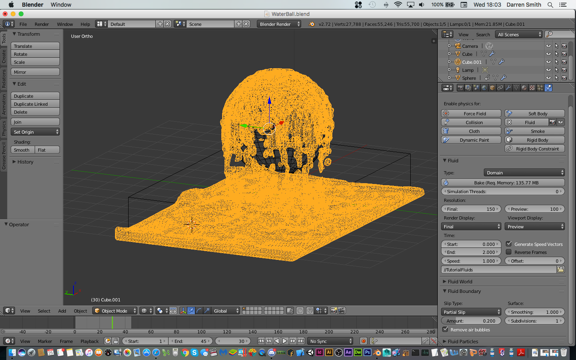
Figure 2: The fluid interacting with the ball
Once the fluid is created, the object is then animated. This is done by setting the keyframe in the animation slider before the object is moved in the scene. Once that is done, the animation is played and the object is interacting with the fluid by passing through the container. The figure above is the result of the animation.
Screen Shot 2017-01-25 at 18.55.18
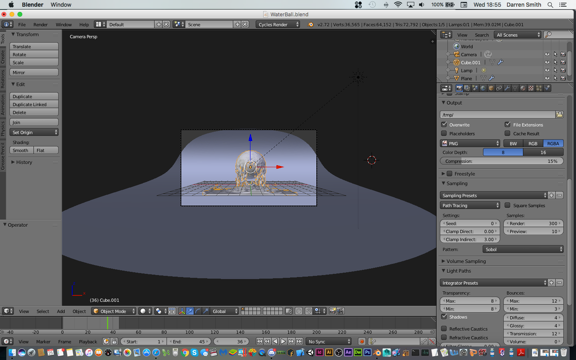
Figure 3: Setting up the camera shooting the fluid on the ball.

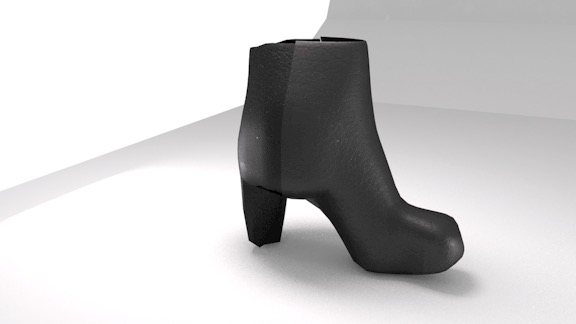
Once the animation is created, the next step is to add some lightning and camera to the scene. This is so the object can be rendered through the lens as the end result. Lastly material is added to the object and fluid to give it a sense of realism. In this case I chose the glass texture for the object to give it a sense of reflection against the fluid. Below is the end result.

WaterBallRender

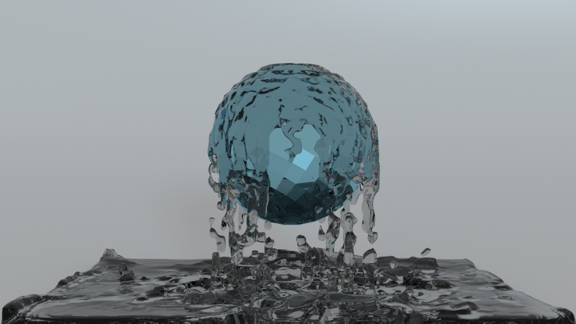
Figure 4: Final Render of the Fluid

NEXT STEP?

Experiment with the lightning / baking options in Blender so the object can be taken into Sketchfab for viewing purposes.

Categories
3D Design

Unity Community Art Competition April 2016 Ghost Busters: Models

Screen Shot 2016-04-21 at 12.25.01

Figure 1: Modeling Test

Ghosbuster_1

Figure 2: Render Test using Toon Shader

Categories
3D Design

Unity Community Art Competition April 2016 – GhostBusters: Introduction

After working my brochure and my game projects I have resumed the Unity Community Art Competitions. 

The theme for this month is ghost busters which will open some fresh ideas and give me the opportunity to try new techniques.