Categories
Uncategorized

RPG Hack Slash Game: Early Progress the Player Controls and Enemy Movement

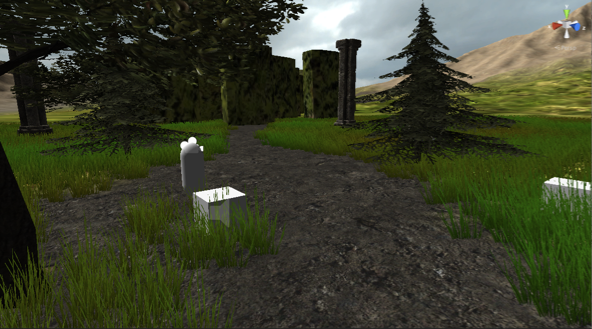
The next step is create a couple of scripts that controls the players and enemies movements. Also the attack script is implemented into both the players and enemy game object. 

To do this firstly a third person controller and script is attached to the Player game object. This will allow the object (which is the player game object in this case) to be control using the keyboard controls. Below is an example of the script.

Screen Shot 2017-01-17 at 17.09.02
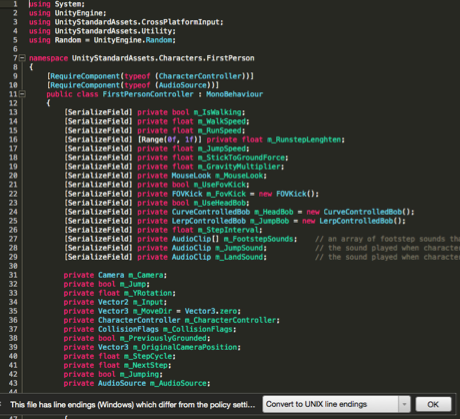
Figure 1: Third person Controller Script


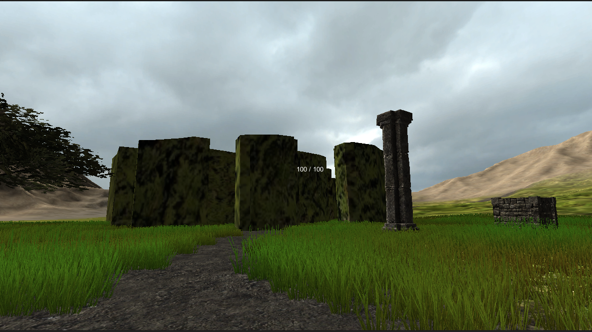
The next step is to implement a way for the enemy to move towards the player. This is achieved by using a function that allows the enemy to see the player and then rotate and move towards the player. When the player moves away the enemy will continue to follow them. Below is the script i used for the enemy chase.

Screen Shot 2017-01-17 at 17.10.03
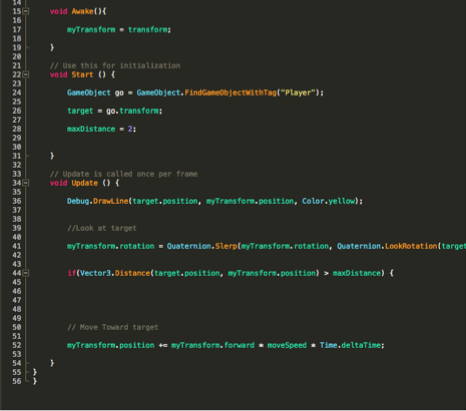
Figure 2: Enemy Attack Script: Chasing the Player

Once the script is created the next step is to implement the player attack script. This will allow the player to able to attack the enemy. Down the line it will be developed into a more complex structure such as selecting which enemies to attack and maybe potential interacting with objects. Below is the script.

Screen Shot 2017-01-17 at 17.09.35
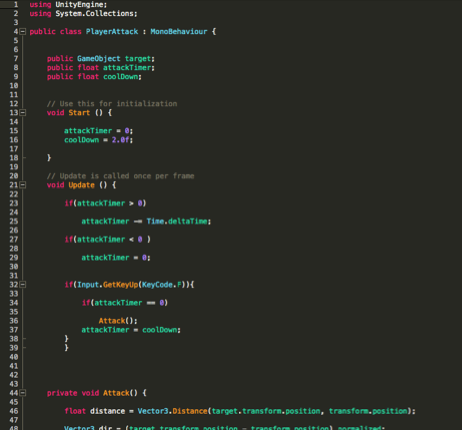
Figure 3: Player Attack Script.

Categories
Uncategorized

Unity Shooter Game Completed

Funz Shooter is a shooter game created for PC. 

This project is just a simple demonstration of using C sharp to create the mechanics and involved using new techniques such as the Navigation system in order to the AI path. Also the levels were designed using a generator algothrim which was also designed using C sharp code.

Even though the game is finished, i will work twerking the bugs and appearance of the game.

Categories
3D Design

Unity Community Art Competition April 2016 Ghost Busters: Models

Screen Shot 2016-04-21 at 12.25.01

Figure 1: Modeling Test

Ghosbuster_1

Figure 2: Render Test using Toon Shader

Categories
3D Design

Unity Community Art Competition April 2016 – GhostBusters: Introduction

After working my brochure and my game projects I have resumed the Unity Community Art Competitions. 

The theme for this month is ghost busters which will open some fresh ideas and give me the opportunity to try new techniques.

Categories
Game Projects

Next Upcoming Projects

This section will be a reflection of the year so far and of what to come next year. It has certainly been a interesting year, from working on the brochure to experimenting the 2D tools in Unity 3D.

I am currently experimenting a bit in Xcode 3D, since you can now upload and test apps on your phone for free instead of paying £100 a year for apple developer. However you still got to pay if you want apple to sell your app in their app store.

As for the future, the next aim would be learning how to produce a RPG(Role playing game) game and revive the Metoria Game Project. Also i am quite interested to test out Sketchfab 3D Animation features by potentially upload any 3D Animations

.ComingSoonRPG_Game  ComingSoonShooter_Game

Categories
3D Design

Modelling the 3D Torch Asset

This week i created a torch model for my game. The first step was to do a design drawing of the torch. Once the model was sketched, it was used a reference in Maya Autodesk.

Screen Shot 2014-09-01 at 12.25.26

Figure 1: Sketched Drawing of the Torch.

In order to accurately design and get a more organic shape, I used a nurbs splines drawing tool.
Once the shape was drawn, i then used the NURBS spline function and it produced the result as shown below in figure 2.


Screen Shot 2014-09-01 at 12.22.50

Figure 2: Torch Model

The next step is to add a texture to the mesh before importing it to Unity 3D.

Categories
Uncategorized

Junior 3D Modeller Technical Exercise.

For the purpose of this task, I produced 3 models to demonstrate my 3D design skills, thought process and get a feel of the workflow used when designed house hold products. 

In order to produce the products, 2D diagrams was used as a reference to get all the measurements. This is to ensure that the models matches the original products as close as possible. Once the measurements were made, I then designed the products using 3ds Max ’s tools such as Edit Poly and Edge loop.

After designing the models, I then selected my textures and laid out all my uv textures using the Unwrap UV tool in 3ds Max and Photoshop. The end result is shown below in figure 1 – 4.

Central_basin_monobloc_Top  Central_basin_monobloc_Bottom

Figure 1&2: Central_basin_Mononloc_tap Uv Texture Maps

Celeste_60_Unit_American_Walnut_FrontBottomCeleste_60_Unit_American_Walnut_FrontTop

Figure 3&4: Central_60_Unit_American_Walnut Uv Texture Maps

Once the models are textured, they are ready to be rendered and viewed. The end result is showed below in Figure 5 – 7.

Figure 5: Central_60_Unit_American_Walnut


Figure 6: Central_basin_Mononloc_tap


Figure 7: Bolonia_Countertop

Categories
Game Projects

Metoria Initial Game Environment

Below are the early stages of the game. This was used to get a feel of what the game environment looks like . More development will be updated in the future.

Screen Shot 2014-01-08 at 17.27.14

Figure 1: Starting point of the level


Screen Shot 2014-01-08 at 17.34.03

Figure 2: Lake scene

Screen Shot 2014-01-08 at 17.30.30

Figure 3: Maze Entrance

Categories
Game Projects

Metoria Game Design Concept Drawings

Initial Concept


Below are the early concept sketches of the game project Metoria.

img029-Recovered

Figure1: Pyramid and Entrance to the Pyramid


Figure 1 shows the design of the pyramid and pillars which are going to be in front of the entrance. The player will have to walk through the first entrance before reaching the pyramid ’s main entrance.

Concept Drawing Pyramind

Figure 2: More Pyramid concept Drawings

Figure 2 is just another design drawing of the pyramid but showing the possibility of having a cloud above it. This is to give a perception that the pyramid is so tall that it reaches to the skies. Another idea is to have ruin and broken buildings around the area of the pyramid. This is just initial stage, so anything could change.


MetoriaGameTitleConceptDrawing

Figure 3: Initial Design of the Start Menu


Figure 3 shows the Initial Design of the Main Menu. The Menu will be a 3D menu showing the Pyramid in the garden environment. Although the final design is not decided yet, the project is in working progress.

Categories
Game Projects

Metoria Game Design: Designing the Maze

Metoria Maze title


In this section I will explain how I created the maze. In order to design the maze, research was done in order to know what the maze structure looks like. Based on my research I discovered in order to design a successful maze, the user must be able to enter and navigate through the other side. The structure of the maze will determine the complexity of the navigation.

After researching maze structures, I created some concepts of various maze structures as shown below in figure 1.

EyeMazeMaze

Figure 1: Concept design drawings of mazes

The next step is to create the maze. In order to do this, I used using maya tools and the sketched maze map as an outline to create a mesh of my maze in Maya Autodesk. The result is shown below in figure 2.


Screen Shot 2014-06-18 at 12.25.40

Figure 2: Maze model: Wireframe

Once the model is created, I then applied a texture to the model. The result is shown below in figure 3.

Screen Shot 2014-06-18 at 12.28.48

Figure 3: Maze model textured

Once the model is textured, I then exported the model into Unity as an asset. The model asset is then placed into the game and resized and below is the end result in figure 4.

Screen Shot 2014-06-18 at 14.59.27

Figure 4: Maze model in the environment